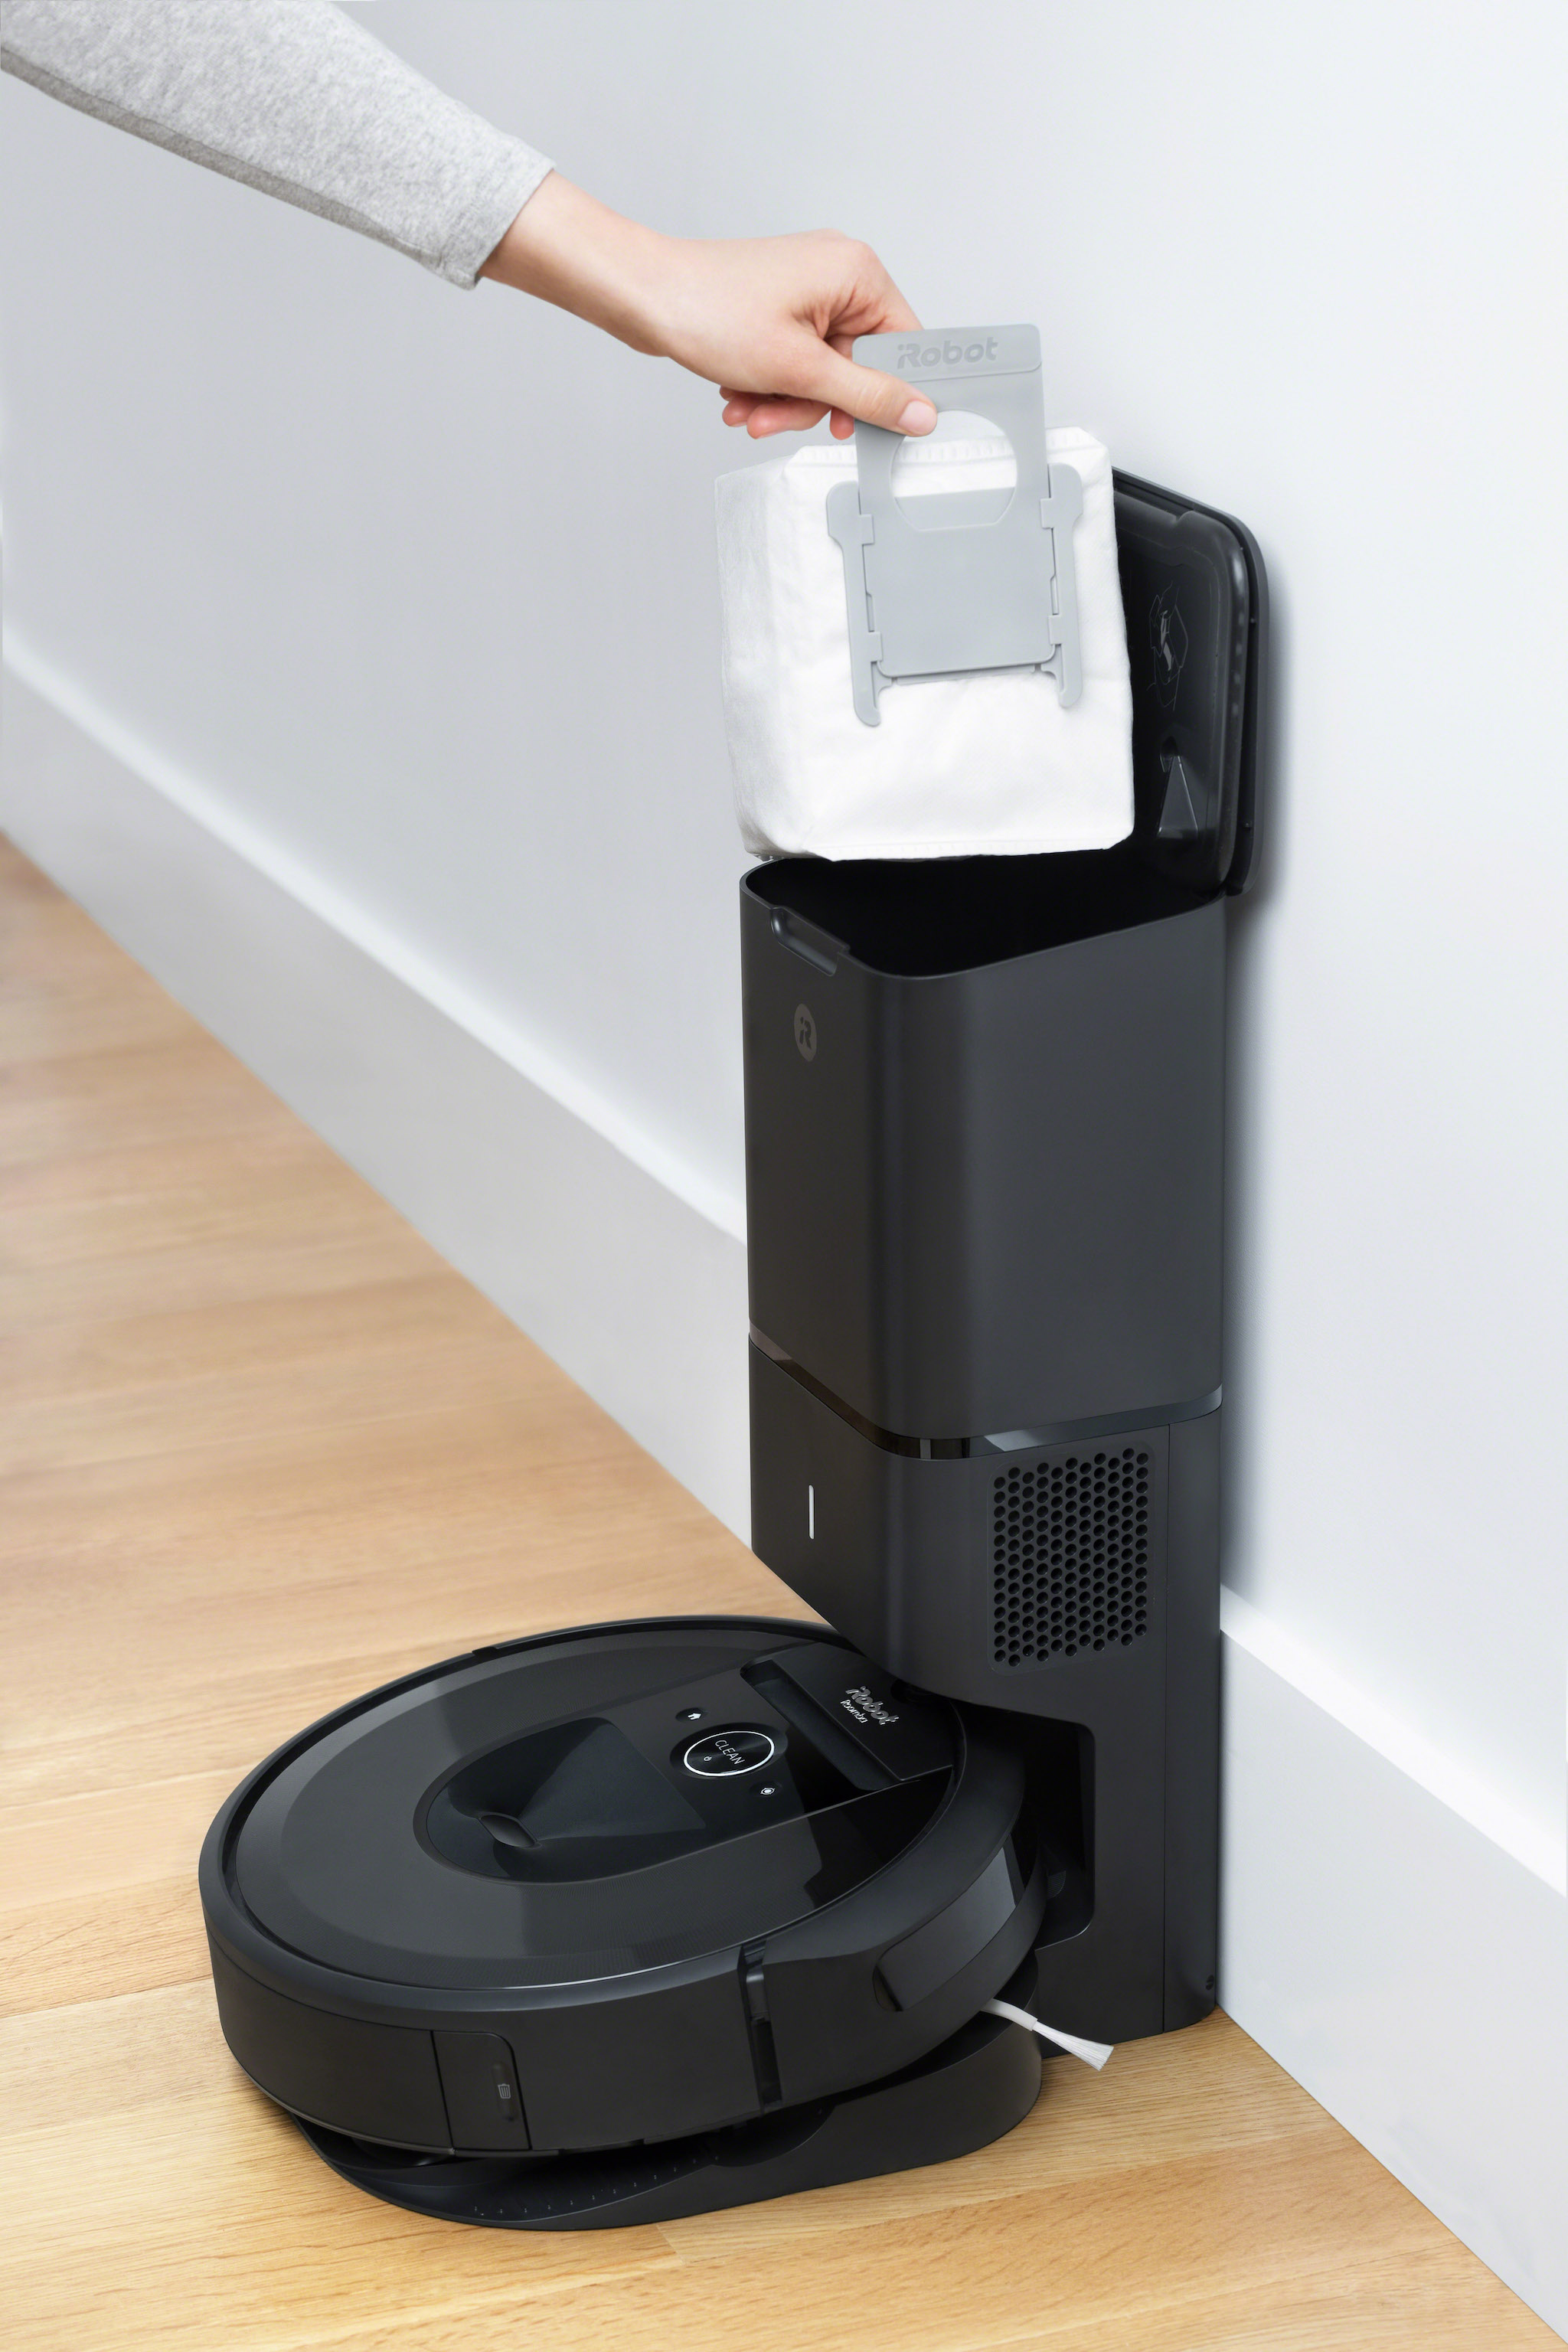
To empty the Roomba bin, press the bin release button and open the bin door. Then, remove and empty the bin.
Cleaning and maintaining your Roomba is crucial to ensure its efficient performance and longevity. Understanding how to properly empty the Roomba bin is an essential part of its maintenance. Regularly emptying the bin prevents clogging and maintains suction power. By following the simple steps to empty the bin, you can keep your Roomba operating at its best, ensuring a clean and tidy home environment.
Additionally, regular maintenance will prolong the lifespan of your Roomba, saving you money in the long run. Understanding how to properly empty the Roomba bin will contribute to a hassle-free and efficient cleaning experience.

Credit: homesupport.irobot.com
Locating The Eject Button
When it comes to keeping your Roomba vacuum cleaner in top shape, it’s crucial to know how to properly empty the bin. The bin is where all the dirt and debris collect as your Roomba does its job. To ensure efficient cleaning and prevent any issues, you must know how to locate the eject button on your Roomba. This small but significant button allows you to remove the bin easily and empty its contents without any hassle.
Finding The Eject Button On Your Roomba
Locating the eject button is the first step in the process of emptying your Roomba’s bin. The eject button is typically situated on the back panel of the Roomba. It is designed to be easily accessible for users, allowing them to remove the bin effortlessly.
To find the eject button on your Roomba, follow these simple steps:
- Turn your Roomba upside down, exposing the bottom panel.
- Look for a small button labeled “Eject” on the back panel of your Roomba.
- The eject button may be distinguished by its unique shape or icon, making it easily identifiable.
Note: Different Roomba models may have slight variations in the location or appearance of the eject button. Therefore, always refer to your Roomba’s user manual for specific instructions.
Ensuring A Smooth Eject Process
Once you have located the eject button on your Roomba, it’s essential to know the correct procedure for removing the bin. Following these steps will ensure a smooth and efficient eject process:
- Gently press the eject button using your finger or a small tool.
- The bin will disengage from the Roomba and release, allowing you to remove it.
- Hold the bin firmly and lift it away from the Roomba.
- Dispose of the collected dirt and debris into a trash bag or dustbin, ensuring proper hygiene.
Note: Always remember to read the specific instructions provided by the manufacturer to prevent any damage to your Roomba or injury to yourself.
In conclusion, finding and utilizing the eject button on your Roomba is crucial for effectively emptying the bin. By following the simple steps outlined above, you will be able to remove the bin easily and maintain your Roomba’s performance. Make sure to clean the bin regularly to keep your Roomba functioning optimally and efficiently.
Opening The Dust Bin
To empty the Roomba bin, locate the eject button and press it to release the bin. Then, open the dust bin and remove any debris. Finally, reinstall the dust bin back into the Roomba.
Steps To Open The Dust Bin
To effectively open the dust bin of your Roomba, follow these simple steps:
- Locate the bin release button on the back of the robot.
- Press the bin release button to remove the dust bin.
- Hold the dust bin firmly and open the bin door.
- Dispose of the collected debris and close the bin door securely.
- Re-insert the dust bin into the Roomba until a click sound confirms it is properly secured.
By following these steps, you can easily open the dust bin of your Roomba for efficient cleaning.
Proper Technique For Opening The Dust Bin
When opening the dust bin of your Roomba, it’s essential to use the proper technique to prevent any spills or damage. Here’s the correct approach:
- Ensure the Roomba is turned off before attempting to open the dust bin.
- Always grasp the dust bin firmly, supporting its weight, to avoid accidental dropping.
- Carefully open the bin door to prevent debris from falling out uncontrollably.
- Dispose of the collected debris in a suitable waste disposal receptacle.
- Thoroughly clean the inside of the dust bin before re-inserting it into the Roomba.
- Follow the manufacturer’s instructions for maintenance and care of the dust bin to prolong the lifespan of your Roomba.
By following the proper technique for opening the dust bin, you can maintain the cleanliness and performance of your Roomba effectively.
Installing The Dust Bin
When it comes to keeping your Roomba running efficiently, properly installing the dust bin is crucial. This ensures that the vacuum’s bin is securely in place, preventing any potential malfunctions. Let’s take a look at how to properly install the dust bin and common mistakes to avoid while doing so.
How To Properly Install The Dust Bin
Properly installing the dust bin in your Roomba is essential for optimal vacuum performance. Here’s a step-by-step guide to ensure you do it correctly:
- First, ensure the dust bin is empty and clean before installation.
- Align the tabs on the dust bin with the corresponding slots on the Roomba.
- Slide the dust bin into place until you hear a click, indicating that it is securely installed.
- Double-check that the dust bin is firmly in place and properly seated to avoid any issues during operation.
Common Mistakes To Avoid While Installing The Dust Bin
While installing the dust bin, it’s important to avoid certain common mistakes that could lead to operational issues:
- Not cleaning the dust bin: Failing to empty and clean the dust bin before installation can lead to reduced suction and potential clogging.
- Incorrect alignment: Improperly aligning the tabs of the dust bin with the slots on the Roomba may result in the bin not being securely placed.
- Inadequate seating: Failing to properly seat the dust bin can lead to potential dislodging during operation, causing the Roomba to malfunction.
Emptying The Dust Bin Manually
To manually empty the Roomba bin, locate the eject button and open the dust bin. Afterward, you can install a new dust bin to continue cleaning. Follow these steps to ensure proper maintenance of your Roomba.
Steps To Manually Empty The Dust Bin
Emptying the dust bin of your Roomba manually is a simple process that ensures your vacuum cleaner continues to function effectively. Follow these steps to complete the task:
- Locate the eject button on your Roomba. It is usually located towards the back of the vacuum cleaner.
- Press the eject button to release the dust bin from the Roomba.
- Open the dust bin door by lifting the latch or flipping open the lid, depending on the model of your Roomba.
- Hold the dust bin over a trash can and carefully empty the contents into the trash.
- Close the dust bin door by securing the latch or closing the lid firmly.
- Reattach the dust bin back to the Roomba by inserting it into the vacuum cleaner until it clicks into place.
Tips For Effective Dust Bin Emptying
To ensure proper maintenance of your Roomba and efficient cleaning, follow these tips for effective dust bin emptying:
- Empty the dust bin regularly to prevent it from reaching full capacity.
- Dispose of the debris in a sealed bag to prevent it from spreading or causing allergies.
- Clean the dust bin with mild soap and water regularly to remove any residue or buildup.
- Inspect the dust bin for any damage or wear and replace it if necessary.
- Check the dust bin sensors and clean them thoroughly if the full bin indicator is illuminated or blinking.
- Store your Roomba in a clean and dry area to prevent dust and debris from accumulating inside the dust bin.
Troubleshooting & Faqs
Having trouble emptying your Roomba’s bin? To empty the bin, press the bin release button and remove it. Open the bin door, empty it, and clean the filter. If the “Empty Bin” button isn’t showing on the app, check the robot’s IR signal or clean the full bin sensors thoroughly to fix it.
Why Is There No Empty Bin Button On My Irobot App?
If you’re unable to find the “Empty Bin” button on your iRobot app, it could be due to a possible blockage in the robot’s infrared (IR) signal to the base. However, it’s important to note that the j series models do not use IR technology. To address this issue, you should still proceed with regular robot maintenance as a possible contact issue could be causing the problem. Even though the button is not visible on the app, you can still empty the bin manually.
How Do I Know When Roomba Bin Is Full?
To determine if your Roomba bin is full, look for the red full bin indicator. If it’s illuminated or blinking, it indicates that Roomba has sensed that the bin is full and needs to be emptied. When this indicator is active, make sure to not only empty the bin but also clean the full bin sensors and sensor ports thoroughly, ensuring proper functionality for future use.
Troubleshooting Common Issues With Roomba Dust Bin
When it comes to troubleshooting common issues with the Roomba dust bin, there are a few things to keep in mind:
- Ensure proper installation: When emptying the bin, make sure it is securely installed in the robot. Press the bin release button on the back of the robot to remove the bin, and then open the bin door to empty it. Grasp the side of the filter to remove and clean it as well.
- Regular cleaning and maintenance: To prevent clogs and optimize performance, empty the bin regularly and check for any blockages or debris build-up. Also, clean the full bin sensors and sensor ports thoroughly to avoid any false indications of a full bin.
- Check for proper contact: If you’re having issues with the empty bin button on the app, ensure that there are no loose or disconnected wires obstructing the robot’s communication with the base.
- Consult the user manual: If you’re still experiencing difficulties with the Roomba dust bin, refer to the user manual for specific troubleshooting instructions or contact iRobot support for further assistance.
By following these troubleshooting steps and practicing regular maintenance, you can keep your Roomba dust bin clean and ensure optimal performance from your device.
Credit: spectrum.ieee.org

Credit: m.youtube.com
Frequently Asked Questions For How To Empty Roomba Bin
Why Is There No Empty Bin Button On My Irobot App?
If you can’t find the “Empty Bin” button on your iRobot app, there may be a communication issue with the Clean Base. Check if something is obstructing the robot’s IR signal to the Base and ensure proper maintenance for the robot.
Note that the j series does not use IR.
How Do I Know When Roomba Bin Is Full?
When the red full bin indicator is illuminated or blinking, it means Roomba senses that the bin is full. Empty the bin and clean the full bin sensors and sensor ports thoroughly.
How Do I Empty My Roomba 600 Series?
To empty your Roomba 600 series, locate the eject button and open the dust bin. Install the dust bin back after emptying it.
How Do I Empty My Irobot 694?
To empty your iRobot 694, locate the eject button and open the dust bin. Install the dust bin back once it’s empty. Ensure the robot is maintained properly if the “Empty Bin” button does not appear in the app. Clean the full bin sensors and sensor ports if the red full bin indicator is illuminated or blinking.
Press the bin release button on the back of the robot to remove the bin and open the bin door to empty it.
Conclusion
To effectively empty your Roomba bin, follow these simple steps. First, locate the eject button and press it to release the bin. Then, open the bin door to empty all the collected dirt and debris. Remember to clean the full bin sensors and sensor ports thoroughly if the red full bin indicator is illuminated.
Regularly maintaining and emptying the Roomba bin will ensure optimal cleaning performance. Keep your Roomba running smoothly and efficiently with these easy steps.


